Applying loads to the concrete frame
Apply selfweight to the whole structure
- Go to Data > Loading > Gravity loading
- Click on the first cell and press enter to copy the default settings. Make sure the load is set to -1.
Apply a load to a 2D member
-
Go to Data > Loading > 2D entity loading > Face loads
-
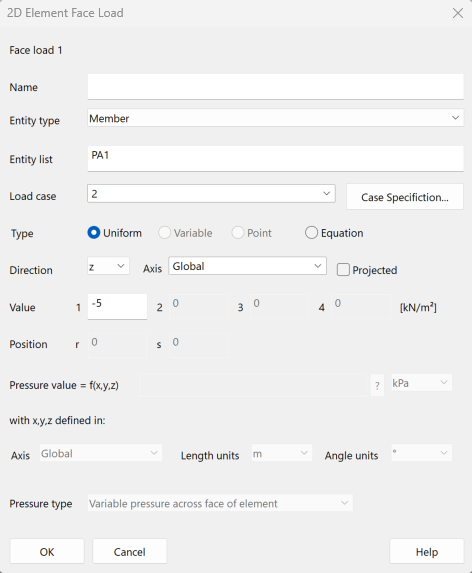
Double click the first cell to bring up the 2D element face load wizard.
-
In Entity type, input Member, in Entity list input PA1. Set the load case to '2'. Add a load of −5 kN/m2 in the z global direction and click OK.
-
Return to the graphics window. Click on the Load diagrams icon:
 . In the cases drop down, toggle between L1 and L2. A face load arrow will be displayed in the centre of each 2D element.
 -
Click on the annotate icon
 then click and drag the mouse across the structure to view the numerical results.